How to Make Video Louder Before Exporting Your Dub
Last Updated


Jump to section
Jump to section
Share
Share
Share

AI Video Translator, Localization, and Dubbing Tool
Try it out for Free
Your team just finished localizing a product demo. The translation is accurate. The timing feels correct. The voice sounds clear in headphones.
Then you export the dubbed version and test it on a laptop speaker. The volume feels inconsistent. Some lines are quiet. Others spike unexpectedly. In a few sections, background noise competes with dialogue.
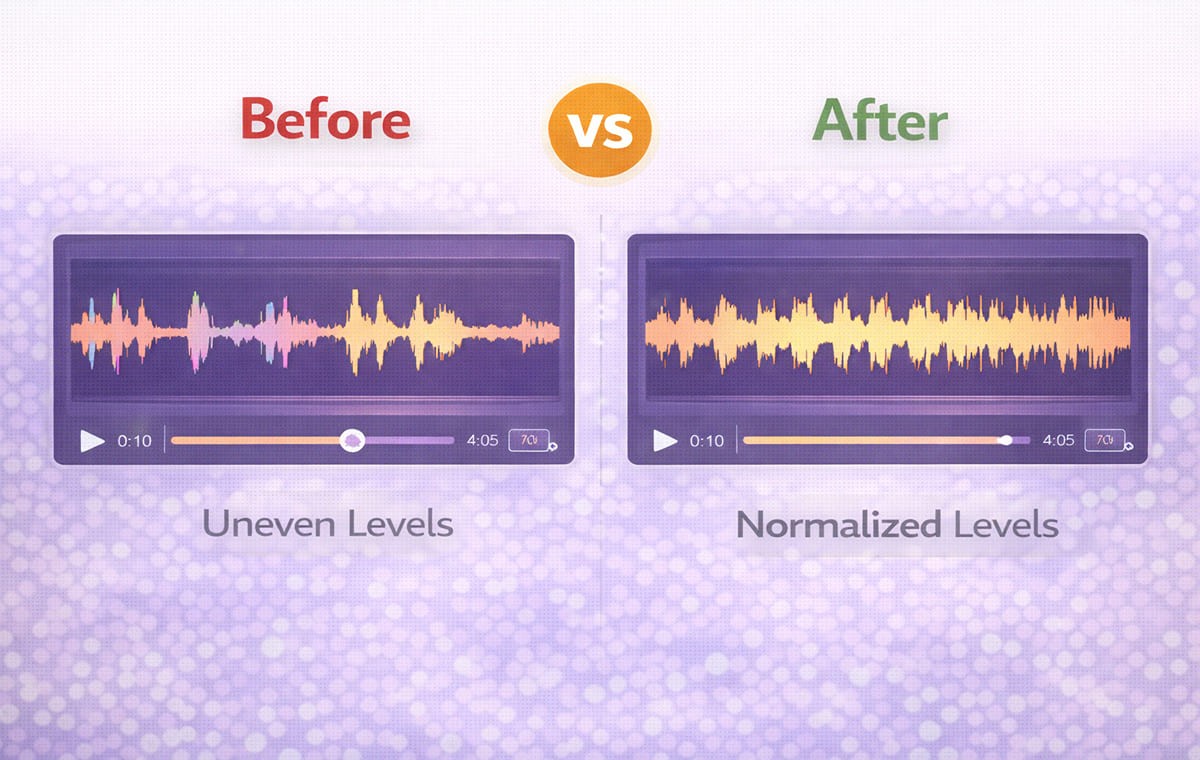
Before you publish a localized video, you need one final step: audio normalization, especially if you’re exporting multiple language versions, where inconsistent loudness can make one version feel ‘lower quality’ than the others.
If you’ve ever searched how to make a video louder, the real goal isn’t just turning it up. It stabilizes levels so your dubbed versions sound clean and consistent, and so every language export feels like the same brand-quality production, not a mix of “loud in English, quiet in Spanish”. In this guide, we will explain how to make a video louder correctly, when to use a video volume booster, and how normalized audio improves Automatic Dubbing and Video Translator workflows.
This guide is for creators, SaaS marketing teams, and training departments preparing multilingual content for external release.
How To Make A Video Louder Without Distorting Dubbing Quality?
When people try to make a video louder, they often push the volume too far. That increases overall loudness but can introduce distortion or clipping.
Instead of blindly increasing gain, use a structured approach:
Measure the existing audio level
Normalize peaks to a safe range
Balance dialogue levels
Apply light compression if needed
Test across devices
A proper workflow protects voice clarity, which is critical in Dubbing and Video Translation projects.
If you are preparing multilingual versions inside a structured workflow (for example, in Perso Dubbing), maintaining stable audio before final export ensures smoother results in AI dubbing workflows for multilingual video output.
Why Audio Normalization Matters for Automatic Dubbing?
Automatic Dubbing relies on clean audio alignment. If levels fluctuate, several problems appear:
Some translated lines sound softer than others
Emotional emphasis feels inconsistent
Background noise becomes more noticeable in certain segments
Normalization keeps voice levels stable across the entire video. This improves clarity and listener comfort, especially in product demos, tutorials, and training sessions.
When preparing localized versions for international distribution, aligning audio levels within a multilingual video translation and dubbing platform helps maintain consistent presentation across markets. In Perso Dubbing, teams can normalize to a chosen target and keep that target consistent across language versions so the output feels uniform across markets.
Video Volume Booster Vs Proper Normalization
A video volume booster simply increases gain. A true normalization process balances sound.
Here is the difference:
Method | What It Does | Risk Level | Best Use Case |
Video volume increaser | Raises overall gain | Can cause distortion | Quick fixes for low audio |
Video volume booster with limiter | Boosts and caps peaks | Moderate control | Simple dialogue adjustments |
Proper normalization | Balances peaks and averages | Low risk | Professional Dubbing export |
Compression + normalization | Smooths dynamic range | Controlled | Product demos and tutorials |
If you are wondering how to make a video louder safely, normalization with light compression is often the better approach.
How To Make a Video Louder for Product Demos?
Product demos require clear dialogue. Viewers must hear feature explanations without strain.
Follow this workflow:
Step 1: Check peak levels
Open your editing software and review peak meters. Dialogue peaks should not exceed safe limits.
Step 2: Normalize dialogue track
Most editors allow peak normalization. Apply it to dialogue only, not background music.
Step 3: Reduce dynamic range
If some lines are much quieter than others, apply gentle compression to smooth volume swings.
Step 4: Balance background music
Lower music slightly so the voice remains dominant. This is especially important in Dubbing exports.
When localizing demo content across languages, clean audio improves retention and trust. The broader impact of consistent presentation across markets is discussed in how AI dubbing supports consistent brand voice across languages.
Subtitle & Script Editor Does Not Fix Volume Problems
It is important to understand what tools can and cannot do.
A Subtitle & Script Editor helps refine timing and phrasing. It does not solve volume inconsistencies.
If your voice sounds uneven, adjusting script segmentation will not fix the problem. Audio must be normalized before final export in your Dubbing workflow.
Video Translation Projects Require Consistent Loudness Standards
When you produce multiple language versions, each file should hit the same loudness target. If one language is noticeably quieter or harsher, viewers read it as inconsistent quality, even when the translation is accurate. Otherwise:
One language version feels louder than another
Ads perform inconsistently
Platform auto-adjustments compress sound unpredictably
Professional teams set a loudness target and apply the same normalization process to every language version. The target you choose should match where the video will live, because platforms and delivery specs often expect specific loudness ranges.
This is especially important when using a Video Translator workflow to distribute demos, ads, or tutorials globally.
Common Audio Issues In Dubbing Workflows
Even when translation and timing are accurate, audio problems can quietly reduce the overall quality of a dubbed video. Most issues come from inconsistent levels, poor mixing decisions, or skipping final sound checks before export.
Clipping after boosting: If peaks exceed limits, audio distorts. This reduces professionalism.
Background noise amplification: A video volume increaser raises everything, including unwanted noise.
Inconsistent speaker levels: Multi-speaker content may require separate track balancing before export.
Uneven emotional tone: If certain lines are significantly louder or softer, emotional impact changes unintentionally.
How To Test Normalized Audio Before Publishing?
Before exporting your final version:
Listen through laptop speakers
Test on mobile device speakers
Use headphones
Check at both low and moderate volume settings
This ensures your Dubbing output performs consistently across environments.
For YouTube Dubbing or product content, the teams that scale fastest use repeatable checks, including loudness checks, before they publish each language version
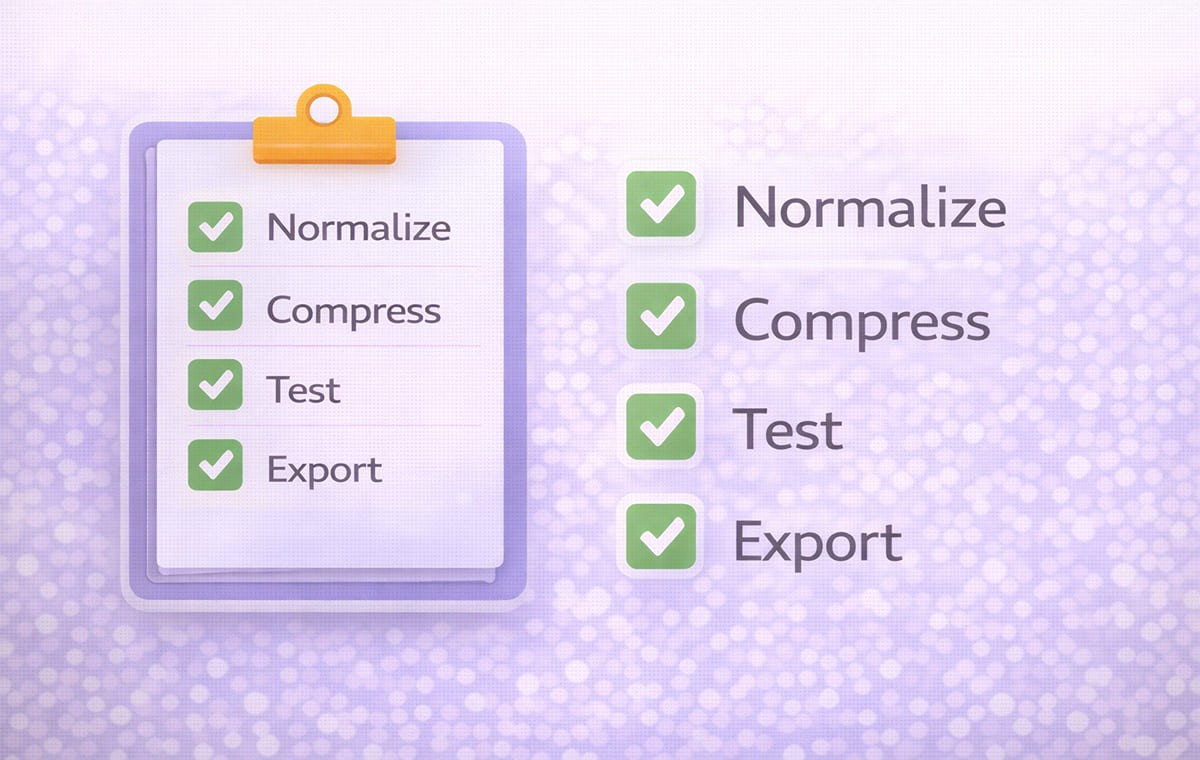
Practical Checklist: How To Make a Video Louder Safely
Use this quick checklist before final export:
Dialogue peaks are balanced
Background music sits below the voice
No audible clipping
No extreme volume jumps
All language versions meet similar loudness targets
Following this process ensures smoother Automatic Dubbing results and more consistent Video Translation output.
Frequently Asked Questions
How to make a video louder without distortion?
Use normalization and light compression rather than extreme gain increases.
Is a video volume booster enough for professional dubbing?
It may help in simple cases, but normalization provides more controlled results.
Should I normalize before or after Dubbing?
Normalize after voice generation but before final export.
Does volume affect Video Translator performance?
Indirectly, yes. Stable audio improves clarity and presentation quality across languages.
Conclusion
Learning how to make a video louder is not about maximizing volume. It is about stabilizing levels so your Dubbing output sounds clean, balanced, and professional across languages. By applying proper normalization instead of simply boosting gain, teams can improve listener comfort, maintain consistent tone, and support scalable Video Translation workflows.
Your team just finished localizing a product demo. The translation is accurate. The timing feels correct. The voice sounds clear in headphones.
Then you export the dubbed version and test it on a laptop speaker. The volume feels inconsistent. Some lines are quiet. Others spike unexpectedly. In a few sections, background noise competes with dialogue.
Before you publish a localized video, you need one final step: audio normalization, especially if you’re exporting multiple language versions, where inconsistent loudness can make one version feel ‘lower quality’ than the others.
If you’ve ever searched how to make a video louder, the real goal isn’t just turning it up. It stabilizes levels so your dubbed versions sound clean and consistent, and so every language export feels like the same brand-quality production, not a mix of “loud in English, quiet in Spanish”. In this guide, we will explain how to make a video louder correctly, when to use a video volume booster, and how normalized audio improves Automatic Dubbing and Video Translator workflows.
This guide is for creators, SaaS marketing teams, and training departments preparing multilingual content for external release.
How To Make A Video Louder Without Distorting Dubbing Quality?
When people try to make a video louder, they often push the volume too far. That increases overall loudness but can introduce distortion or clipping.
Instead of blindly increasing gain, use a structured approach:
Measure the existing audio level
Normalize peaks to a safe range
Balance dialogue levels
Apply light compression if needed
Test across devices
A proper workflow protects voice clarity, which is critical in Dubbing and Video Translation projects.
If you are preparing multilingual versions inside a structured workflow (for example, in Perso Dubbing), maintaining stable audio before final export ensures smoother results in AI dubbing workflows for multilingual video output.
Why Audio Normalization Matters for Automatic Dubbing?
Automatic Dubbing relies on clean audio alignment. If levels fluctuate, several problems appear:
Some translated lines sound softer than others
Emotional emphasis feels inconsistent
Background noise becomes more noticeable in certain segments
Normalization keeps voice levels stable across the entire video. This improves clarity and listener comfort, especially in product demos, tutorials, and training sessions.
When preparing localized versions for international distribution, aligning audio levels within a multilingual video translation and dubbing platform helps maintain consistent presentation across markets. In Perso Dubbing, teams can normalize to a chosen target and keep that target consistent across language versions so the output feels uniform across markets.
Video Volume Booster Vs Proper Normalization
A video volume booster simply increases gain. A true normalization process balances sound.
Here is the difference:
Method | What It Does | Risk Level | Best Use Case |
Video volume increaser | Raises overall gain | Can cause distortion | Quick fixes for low audio |
Video volume booster with limiter | Boosts and caps peaks | Moderate control | Simple dialogue adjustments |
Proper normalization | Balances peaks and averages | Low risk | Professional Dubbing export |
Compression + normalization | Smooths dynamic range | Controlled | Product demos and tutorials |
If you are wondering how to make a video louder safely, normalization with light compression is often the better approach.
How To Make a Video Louder for Product Demos?
Product demos require clear dialogue. Viewers must hear feature explanations without strain.
Follow this workflow:
Step 1: Check peak levels
Open your editing software and review peak meters. Dialogue peaks should not exceed safe limits.
Step 2: Normalize dialogue track
Most editors allow peak normalization. Apply it to dialogue only, not background music.
Step 3: Reduce dynamic range
If some lines are much quieter than others, apply gentle compression to smooth volume swings.
Step 4: Balance background music
Lower music slightly so the voice remains dominant. This is especially important in Dubbing exports.
When localizing demo content across languages, clean audio improves retention and trust. The broader impact of consistent presentation across markets is discussed in how AI dubbing supports consistent brand voice across languages.
Subtitle & Script Editor Does Not Fix Volume Problems
It is important to understand what tools can and cannot do.
A Subtitle & Script Editor helps refine timing and phrasing. It does not solve volume inconsistencies.
If your voice sounds uneven, adjusting script segmentation will not fix the problem. Audio must be normalized before final export in your Dubbing workflow.
Video Translation Projects Require Consistent Loudness Standards
When you produce multiple language versions, each file should hit the same loudness target. If one language is noticeably quieter or harsher, viewers read it as inconsistent quality, even when the translation is accurate. Otherwise:
One language version feels louder than another
Ads perform inconsistently
Platform auto-adjustments compress sound unpredictably
Professional teams set a loudness target and apply the same normalization process to every language version. The target you choose should match where the video will live, because platforms and delivery specs often expect specific loudness ranges.
This is especially important when using a Video Translator workflow to distribute demos, ads, or tutorials globally.
Common Audio Issues In Dubbing Workflows
Even when translation and timing are accurate, audio problems can quietly reduce the overall quality of a dubbed video. Most issues come from inconsistent levels, poor mixing decisions, or skipping final sound checks before export.
Clipping after boosting: If peaks exceed limits, audio distorts. This reduces professionalism.
Background noise amplification: A video volume increaser raises everything, including unwanted noise.
Inconsistent speaker levels: Multi-speaker content may require separate track balancing before export.
Uneven emotional tone: If certain lines are significantly louder or softer, emotional impact changes unintentionally.
How To Test Normalized Audio Before Publishing?
Before exporting your final version:
Listen through laptop speakers
Test on mobile device speakers
Use headphones
Check at both low and moderate volume settings
This ensures your Dubbing output performs consistently across environments.
For YouTube Dubbing or product content, the teams that scale fastest use repeatable checks, including loudness checks, before they publish each language version
Practical Checklist: How To Make a Video Louder Safely
Use this quick checklist before final export:
Dialogue peaks are balanced
Background music sits below the voice
No audible clipping
No extreme volume jumps
All language versions meet similar loudness targets
Following this process ensures smoother Automatic Dubbing results and more consistent Video Translation output.
Frequently Asked Questions
How to make a video louder without distortion?
Use normalization and light compression rather than extreme gain increases.
Is a video volume booster enough for professional dubbing?
It may help in simple cases, but normalization provides more controlled results.
Should I normalize before or after Dubbing?
Normalize after voice generation but before final export.
Does volume affect Video Translator performance?
Indirectly, yes. Stable audio improves clarity and presentation quality across languages.
Conclusion
Learning how to make a video louder is not about maximizing volume. It is about stabilizing levels so your Dubbing output sounds clean, balanced, and professional across languages. By applying proper normalization instead of simply boosting gain, teams can improve listener comfort, maintain consistent tone, and support scalable Video Translation workflows.
Continue Reading
Browse All


